WinFE is a bootable lightweight Windows OS that provides for forensic use. You can check detail information at the following site.
Winfe : the forensic winpe made in windows 8 , windows 7 and vista
https://gverswijvel.wordpress.com/tag/waik-for-windows-10/
Using this article as reference, I have confirmed a procedure of creation for WinFE from Winodows PE (Windows 10 1809). You can create both DVD and/or USB bootable media which have the following features.
- Support UEFI/Secure Boot
- Support USB 3.0
- Display Japanese
Steps of Windows 10 based WinFE
You can create both WinFE 32bit and 64bit, but there are some points.
- 32bit executables don't work on WinFE 64bit.
- On UEFI 64bit, it allows to boot from WinFE 64bit.
If WinFE 32bit works on a target PC it's fine. However, WinFE 32bit won't boot, you have to use WinFE 64bit. So I'll write each procedure for WinFE 32bit and 64bit.
WinFE 32bit
- Download Windows ADK for Windows 10 from Microsoft then install.
Download and install the Windows ADK (https://docs.microsoft.com/en-us/windows-hardware/get-started/adk-install)
(Windows PE is provided as an add-on from version 1809, you need to install add-on as well.) - Get binaries what you would like to use in WinFE. I included the following tools.
- Binary Editor BZ customize version (https://github.com/devil-tamachan/binaryeditorbz)
- EnCase Forensic Imager (https://www.guidancesoftware.com/encase-forensic-imager)
- Explorer++ (https://explorerplusplus.com)
- HWiNFO (https://www.hwinfo.com)
- WinHex (https://www.x-ways.net/winhex/)
- WinShot (http://www.woodybells.com/winshot.html)
- Rename binary file of 32bit Explorer++ to "Explorer.exe" then place it into "C:\winfe_system_x86" folder. Place remaining binaries into "C:\winfe_tools_x86" folder.
- Launch command prompt as administrative plivileges.
- Run the following command:
cmd /k "C:\Program Files (x86)\Windows Kits\10\Assessment and Deployment Kit\Deployment Tools\DandISetEnv.bat"
- Clean up unnecessary files:
Dism /Cleanup-Wim
rmdir c:\winfe_x86 /s
- Copy necessary files to a working folder then mount:
copype x86 c:\winfe_x86
Dism /mount-image /imagefile:C:\winfe_x86\media\sources\boot.wim /index:1 /mountdir:C:\winfe_x86\mount
- Add drivers if you need. The following command adds drivers in "C:\drivers" folder:
Dism /image:c:\winfe_x86\mount /Add-Driver /driver:C:\Drivers\ /recurse
* If you would like to add unsigned drivers, specify "/ForceUnsigned" option.
- Add the necessary packages:
Dism /image:C:\winfe_x86\mount /add-package /packagepath:"C:\Program Files (x86)\Windows Kits\10\Assessment and Deployment Kit\Windows Preinstallation Environment\x86\WinPE_OCs\WinPE-WMI.cab"
Dism /image:C:\winfe_x86\mount /add-package /packagepath:"C:\Program Files (x86)\Windows Kits\10\Assessment and Deployment Kit\Windows Preinstallation Environment\x86\WinPE_OCs\en-us\WinPE-WMI_en-us.cab"
Dism /image:C:\winfe_x86\mount /add-package /packagepath:"C:\Program Files (x86)\Windows Kits\10\Assessment and Deployment Kit\Windows Preinstallation Environment\x86\WinPE_OCs\WinPE-EnhancedStorage.cab"
Dism /image:C:\winfe_x86\mount /add-package /packagepath:"C:\Program Files (x86)\Windows Kits\10\Assessment and Deployment Kit\Windows Preinstallation Environment\x86\WinPE_OCs\en-us\WinPE-EnhancedStorage_en-us.cab"
Dism /image:C:\winfe_x86\mount /add-package /packagepath:"C:\Program Files (x86)\Windows Kits\10\Assessment and Deployment Kit\Windows Preinstallation Environment\x86\WinPE_OCs\WinPE-NetFx.cab"
Dism /image:C:\winfe_x86\mount /add-package /packagepath:"C:\Program Files (x86)\Windows Kits\10\Assessment and Deployment Kit\Windows Preinstallation Environment\x86\WinPE_OCs\en-us\WinPE-NetFx_en-us.cab"
Dism /image:C:\winfe_x86\mount /add-package /packagepath:"C:\Program Files (x86)\Windows Kits\10\Assessment and Deployment Kit\Windows Preinstallation Environment\x86\WinPE_OCs\WinPE-Scripting.cab"
Dism /image:C:\winfe_x86\mount /add-package /packagepath:"C:\Program Files (x86)\Windows Kits\10\Assessment and Deployment Kit\Windows Preinstallation Environment\x86\WinPE_OCs\en-us\WinPE-Scripting_en-us.cab"
Dism /image:C:\winfe_x86\mount /add-package /packagepath:"C:\Program Files (x86)\Windows Kits\10\Assessment and Deployment Kit\Windows Preinstallation Environment\x86\WinPE_OCs\WinPE-PowerShell.cab"
Dism /image:C:\winfe_x86\mount /add-package /packagepath:"C:\Program Files (x86)\Windows Kits\10\Assessment and Deployment Kit\Windows Preinstallation Environment\x86\WinPE_OCs\en-us\WinPE-PowerShell_en-us.cab"
Dism /image:C:\winfe_x86\mount /add-package /packagepath:"C:\Program Files (x86)\Windows Kits\10\Assessment and Deployment Kit\Windows Preinstallation Environment\x86\WinPE_OCs\WinPE-MDAC.cab"
Dism /image:C:\winfe_x86\mount /add-package /packagepath:"C:\Program Files (x86)\Windows Kits\10\Assessment and Deployment Kit\Windows Preinstallation Environment\x86\WinPE_OCs\en-us\WinPE-MDAC_en-us.cab"
Dism /image:C:\winfe_x86\mount /add-package /packagepath:"C:\Program Files (x86)\Windows Kits\10\Assessment and Deployment Kit\Windows Preinstallation Environment\x86\WinPE_OCs\WinPE-FontSupport-JA-JP.cab"
- Set scratch space(I don't know details what it means):
Dism /image:C:\winfe_x86\mount /Set-ScratchSpace:256
- Modify registry value of WinFE which we will create. The following commands set no auto-mount and deactivate TRIM support.
REG LOAD HKLM\WINFE2 C:\winfe_x86\mount\Windows\System32\config\SYSTEM
REG ADD HKLM\WINFE2\ControlSet001\Services\MountMgr /v NoAutoMount /t REG_DWORD /d 1 /f
REG ADD HKLM\WINFE2\ControlSet001\Services\partmgr\Parameters /v SanPolicy /t REG_DWORD /d 4 /f
REG ADD HKLM\WINFE2\ControlSet001\Control\FileSystem /v DisableDeleteNotification /t REG_DWORD /d 1 /f
REG UNLOAD HKLM\WINFE2
SanPolicy 4 means it treats internal storage as off-line and external/boot storage as on-line. This value is added from Windows 8.
(Reference - https://docs.microsoft.com/en-us/previous-versions/windows/it-pro/windows-8.1-and-8/hh825063(v=win.10)) - Copy Explorer++.exe to system folder:
xcopy /s /e "C:\winfe_system_x86\explorer.exe" "C:\winfe_x86\mount\Windows\System32\"
- Place remaining binaries into Root folder:
xcopy /s /e /i "C:\winfe_tools_x86\*" "C:\winfe_x86\mount\"
- Commit these operations then unmount:
Dism /unmount-image /mountdir:C:\winfe_x86\mount\ /commit
- To create iso image, run the following command:
MakeWinPEMedia /iso C:\winfe_x86 C:\winfe_x86\winfe_x86.iso
- To create bootable USB device, run the following command:
MakeWinPEMedia /UFD C:\winfe_x86 "Drive letter of USB device"
A partition which you specify drive letter of usb device have to be 32GB or less.
WinFE 64bit
I explain only difference procedure of WinFE 32bit. WinHex and WinShot don't work on WinFE 64bit, I included the following tools.
- Binary Editor BZ customize version (https://github.com/devil-tamachan/binaryeditorbz)
- EnCase Forensic Imager (https://www.guidancesoftware.com/encase-forensic-imager)
- Explorer++ (https://explorerplusplus.com)
- HWiNFO (https://www.hwinfo.com)
Rename binary file of 64bit Explorer++ to "Explorer.exe" then place it into "C:\winfe_system_amd64" folder. Place remaining binaries into "C:\winfe_tools_amd64" folder. Launch command prompt as administrative plivileges then run the following commands:
cmd /k "C:\Program Files (x86)\Windows Kits\10\Assessment and Deployment Kit\Deployment Tools\DandISetEnv.bat"
Dism /Cleanup-Wim
rmdir c:\winfe_amd64 /s
copype amd64 c:\winfe_amd64
Dism /mount-image /imagefile:C:\winfe_amd64\media\sources\boot.wim /index:1 /mountdir:C:\winfe_amd64\mount
Dism /image:c:\winfe_amd64\mount /Add-Driver /driver:C:\Drivers\ /recurse
Dism /image:C:\winfe_amd64\mount /add-package /packagepath:"C:\Program Files (x86)\Windows Kits\10\Assessment and Deployment Kit\Windows Preinstallation Environment\amd64\WinPE_OCs\WinPE-WMI.cab"
Dism /image:C:\winfe_amd64\mount /add-package /packagepath:"C:\Program Files (x86)\Windows Kits\10\Assessment and Deployment Kit\Windows Preinstallation Environment\amd64\WinPE_OCs\en-us\WinPE-WMI_en-us.cab"
Dism /image:C:\winfe_amd64\mount /add-package /packagepath:"C:\Program Files (x86)\Windows Kits\10\Assessment and Deployment Kit\Windows Preinstallation Environment\amd64\WinPE_OCs\WinPE-EnhancedStorage.cab"
Dism /image:C:\winfe_amd64\mount /add-package /packagepath:"C:\Program Files (x86)\Windows Kits\10\Assessment and Deployment Kit\Windows Preinstallation Environment\amd64\WinPE_OCs\en-us\WinPE-EnhancedStorage_en-us.cab"
Dism /image:C:\winfe_amd64\mount /add-package /packagepath:"C:\Program Files (x86)\Windows Kits\10\Assessment and Deployment Kit\Windows Preinstallation Environment\amd64\WinPE_OCs\WinPE-NetFx.cab"
Dism /image:C:\winfe_amd64\mount /add-package /packagepath:"C:\Program Files (x86)\Windows Kits\10\Assessment and Deployment Kit\Windows Preinstallation Environment\amd64\WinPE_OCs\en-us\WinPE-NetFx_en-us.cab"
Dism /image:C:\winfe_amd64\mount /add-package /packagepath:"C:\Program Files (x86)\Windows Kits\10\Assessment and Deployment Kit\Windows Preinstallation Environment\amd64\WinPE_OCs\WinPE-Scripting.cab"
Dism /image:C:\winfe_amd64\mount /add-package /packagepath:"C:\Program Files (x86)\Windows Kits\10\Assessment and Deployment Kit\Windows Preinstallation Environment\amd64\WinPE_OCs\en-us\WinPE-Scripting_en-us.cab"
Dism /image:C:\winfe_amd64\mount /add-package /packagepath:"C:\Program Files (x86)\Windows Kits\10\Assessment and Deployment Kit\Windows Preinstallation Environment\amd64\WinPE_OCs\WinPE-PowerShell.cab"
Dism /image:C:\winfe_amd64\mount /add-package /packagepath:"C:\Program Files (x86)\Windows Kits\10\Assessment and Deployment Kit\Windows Preinstallation Environment\amd64\WinPE_OCs\en-us\WinPE-PowerShell_en-us.cab"
Dism /image:C:\winfe_amd64\mount /add-package /packagepath:"C:\Program Files (x86)\Windows Kits\10\Assessment and Deployment Kit\Windows Preinstallation Environment\amd64\WinPE_OCs\WinPE-MDAC.cab"
Dism /image:C:\winfe_amd64\mount /add-package /packagepath:"C:\Program Files (x86)\Windows Kits\10\Assessment and Deployment Kit\Windows Preinstallation Environment\amd64\WinPE_OCs\en-us\WinPE-MDAC_en-us.cab"
Dism /image:C:\winfe_amd64\mount /add-package /packagepath:"C:\Program Files (x86)\Windows Kits\10\Assessment and Deployment Kit\Windows Preinstallation Environment\amd64\WinPE_OCs\WinPE-FontSupport-JA-JP.cab"
Dism /image:C:\winfe_amd64\mount /Set-ScratchSpace:256
REG LOAD HKLM\WINFE2 C:\winfe_amd64\mount\Windows\System32\config\SYSTEM
REG ADD HKLM\WINFE2\ControlSet001\Services\MountMgr /v NoAutoMount /t REG_DWORD /d 1 /f
REG ADD HKLM\WINFE2\ControlSet001\Services\partmgr\Parameters /v SanPolicy /t REG_DWORD /d 4 /f
REG ADD HKLM\WINFE2\ControlSet001\Control\FileSystem /v DisableDeleteNotification /t REG_DWORD /d 1 /f
REG UNLOAD HKLM\WINFE2
xcopy /s /e "C:\winfe_system_amd64\explorer.exe" "C:\winfe_amd64\mount\Windows\System32\"
xcopy /s /e /i "C:\winfe_tools_amd64\*" "C:\winfe_amd64\mount\"
Dism /unmount-image /mountdir:C:\winfe_amd64\mount\ /commit
MakeWinPEMedia /iso C:\winfe_amd64 C:\winfe_amd64\winfe_amd64.iso
MakeWinPEMedia /UFD C:\winfe_amd64 "Drive letter of usb device"
Launching WinFE for Windows 10
I have confirmed both CD and USB are able to boot up WinFE on PC which is enabled UEFI and/or secure boot
After boot up, the system drive is recognized as X volume and you can operate command prompt the current directory of which is "X:\Windows\System32". When you run Explroer.exe from the command prompt, you can operate Explore++ window. Now you can launch tools under X:\ folder easily.
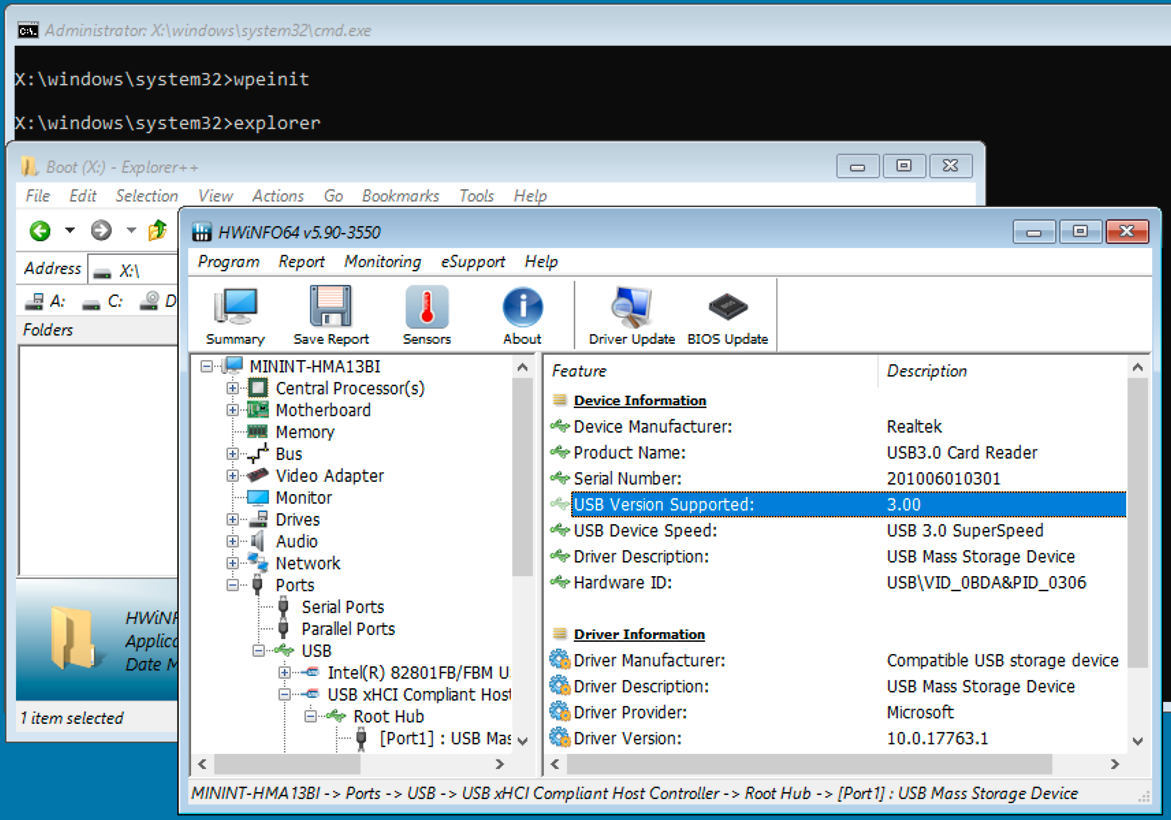
HWiNFO shows a storage connected to USB port is recognized as USB 3.0.

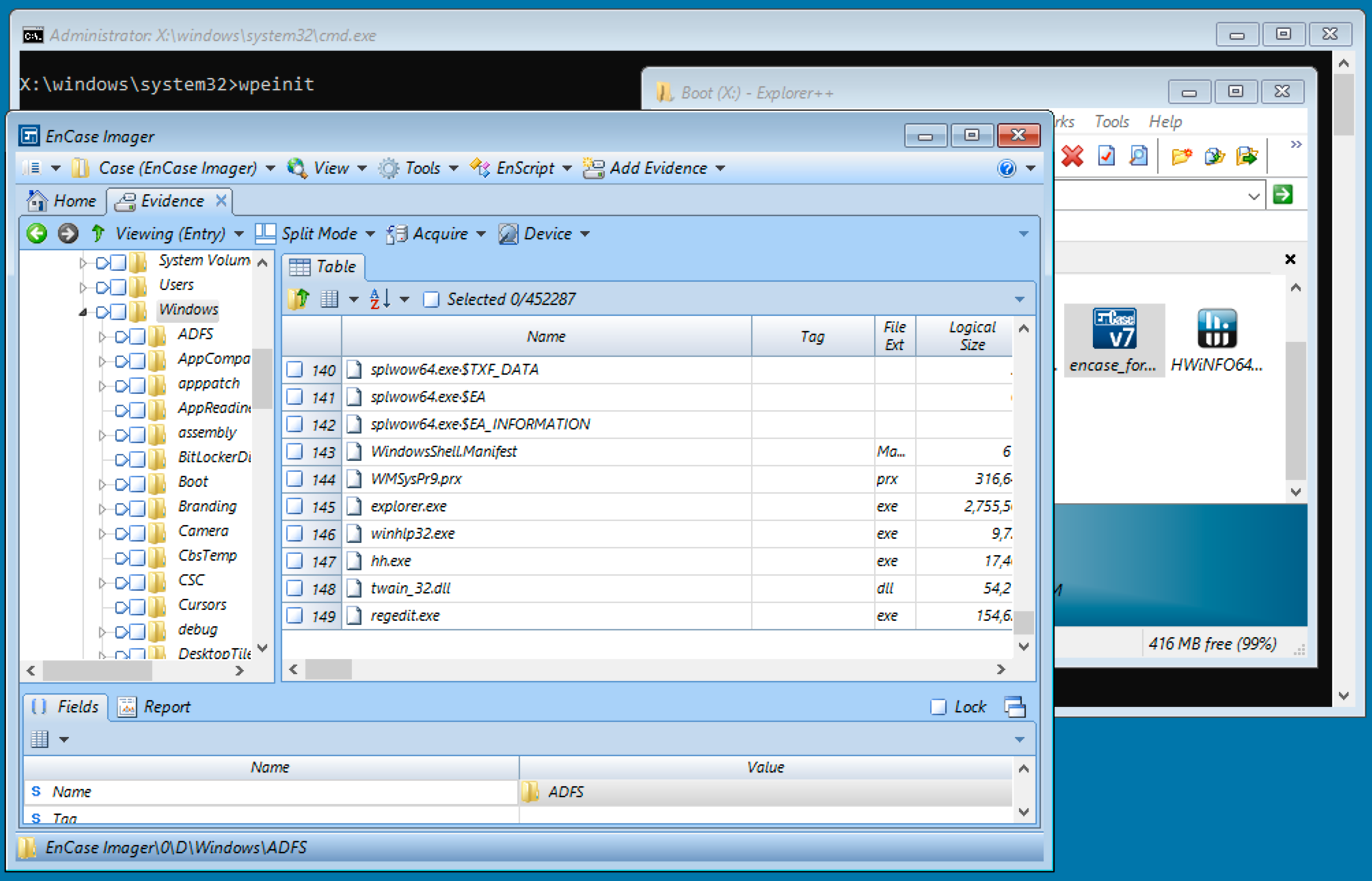
The following screen is EnCase Forensic Imager

Useful commands
WinFE doesn't auto mount storages which are recognized as fixed disk even if the devices are external. You can mount using diskpart:
> diskpart
LIST DISK
SELECT DISK num
LIST VOLUME
SELECT VOLUME num
ASSIGN LETTER=drive letter
Remarks
In this procedure, I would like to include FTK Imager and OSForensics but they didn't work.
You can check "Limitations" of Windows PE at the following URL:
Windows PE (WinPE)
https://docs.microsoft.com/en-us/windows-hardware/manufacture/desktop/winpe-intro
Windows PE is not a general-purpose operating system. It may not be used for any purpose other than deployment and recovery. It should not be used as a thin client or an embedded operating system. There are other Microsoft products, such as Windows Embedded CE, which may be used for these purposes.
To prevent its use as a production operating system, Windows PE automatically stops running the shell and restarts after 72 hours of continuous use. This period is not configurable.
When Windows PE reboots, all changes are lost, including changes to drivers, drive letters, and the Windows PE registry. To make lasting changes, see WinPE: Mount and Customize.
The default Windows PE installation uses the FAT32 file format, which poses its own limitations, including a maximum 4GB file size and maximum 32GB drive size. To learn more, see WinPE: Use a single USB key for WinPE and a WIM file (.wim).
History
2018/11/10 Update for Windows 10 1809
2016/05/08 Initial version
